A Birthday Crown
Daisy is into princesses right now. She loves castles, crowns, and anything princess-related. I didn't push her in this direction, but I like that she came to it on her own, because I was always into princess stuff too. When we drive through downtown, she points to the buildings and says, "Castles!"
The only downside is my tendency to over-analyze Disney princess movies due to too-frequent viewing. I constantly have new things to say to Zane about Frozen and Little Mermaid. Bless that man for listening.


Then I cut purple and pink fabric to the same rectangular size, 18.5'' long and 9'' wide. This was actually a little big on her. I made it with ribbon ties, so we could adjust the size. All the way tight is just right on her head. I didn't realize how big it would be until after I was most of the way through the project. I guess I should have measured the circumference of her head before starting!

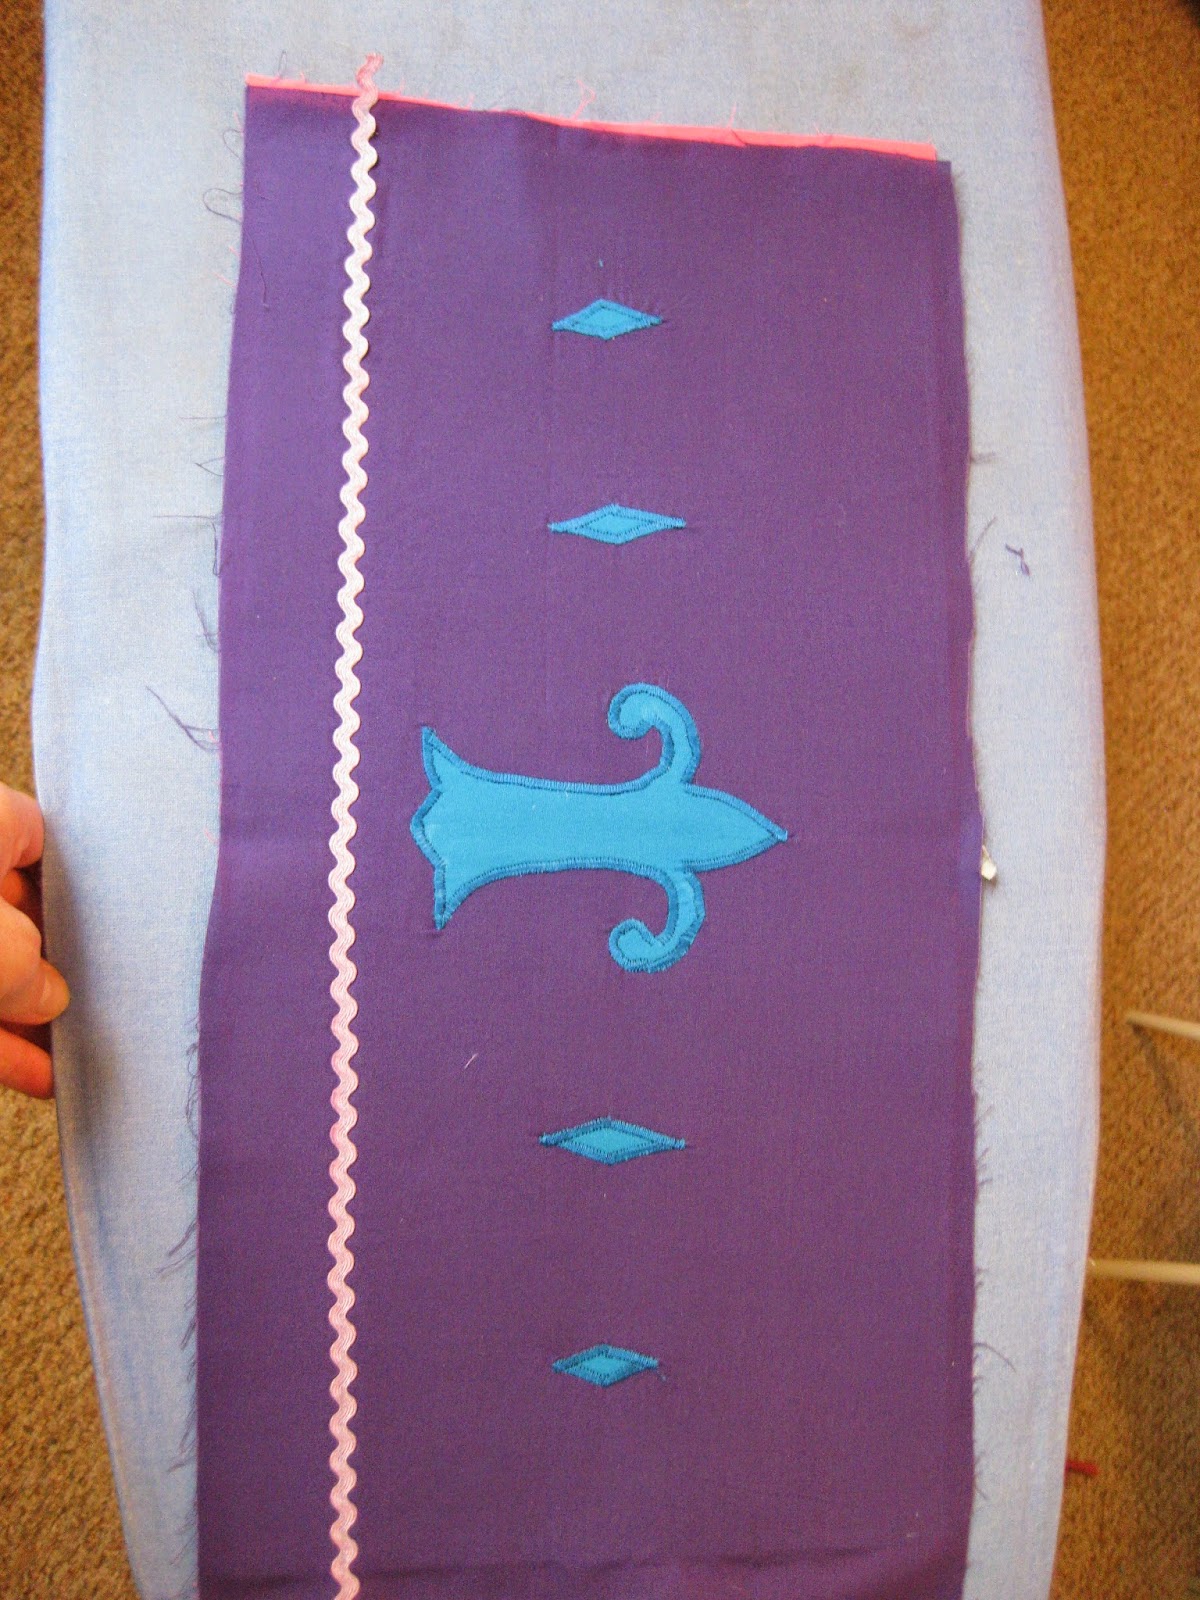
I wanted to make it reversible, so I designed each side differently. The purple side would have a fleur de lis, which I sketched out a few times on paper, then on the fabric with chalk before cutting. I used light-weight interfuse behind the blue fabric to give it a little weight.


The only downside is my tendency to over-analyze Disney princess movies due to too-frequent viewing. I constantly have new things to say to Zane about Frozen and Little Mermaid. Bless that man for listening.
So for her second birthday I decided to make her a princess crown. It was kind of a go-with-the-flow project. I drew up a few plans prior to starting, but most of it developed along the way. That's the nature of arts and crafts, at least when I'm doing them.
I started with some extra-stiff/firm interfuse. I bought this to make Christmas ornaments and ended up with a LOT left over. As you can see, I drew a basic crown shape on it with chalk.
I wanted to make it reversible, so I designed each side differently. The purple side would have a fleur de lis, which I sketched out a few times on paper, then on the fabric with chalk before cutting. I used light-weight interfuse behind the blue fabric to give it a little weight.
I needed something for the other points of the crown, and Zane suggested diamonds! I laid out what I wanted it to look like on the chalk-outlined interfuse. My plan was to get the fleur de lis and diamonds as close to that same location as possible when I sewed it onto the purple fabric.
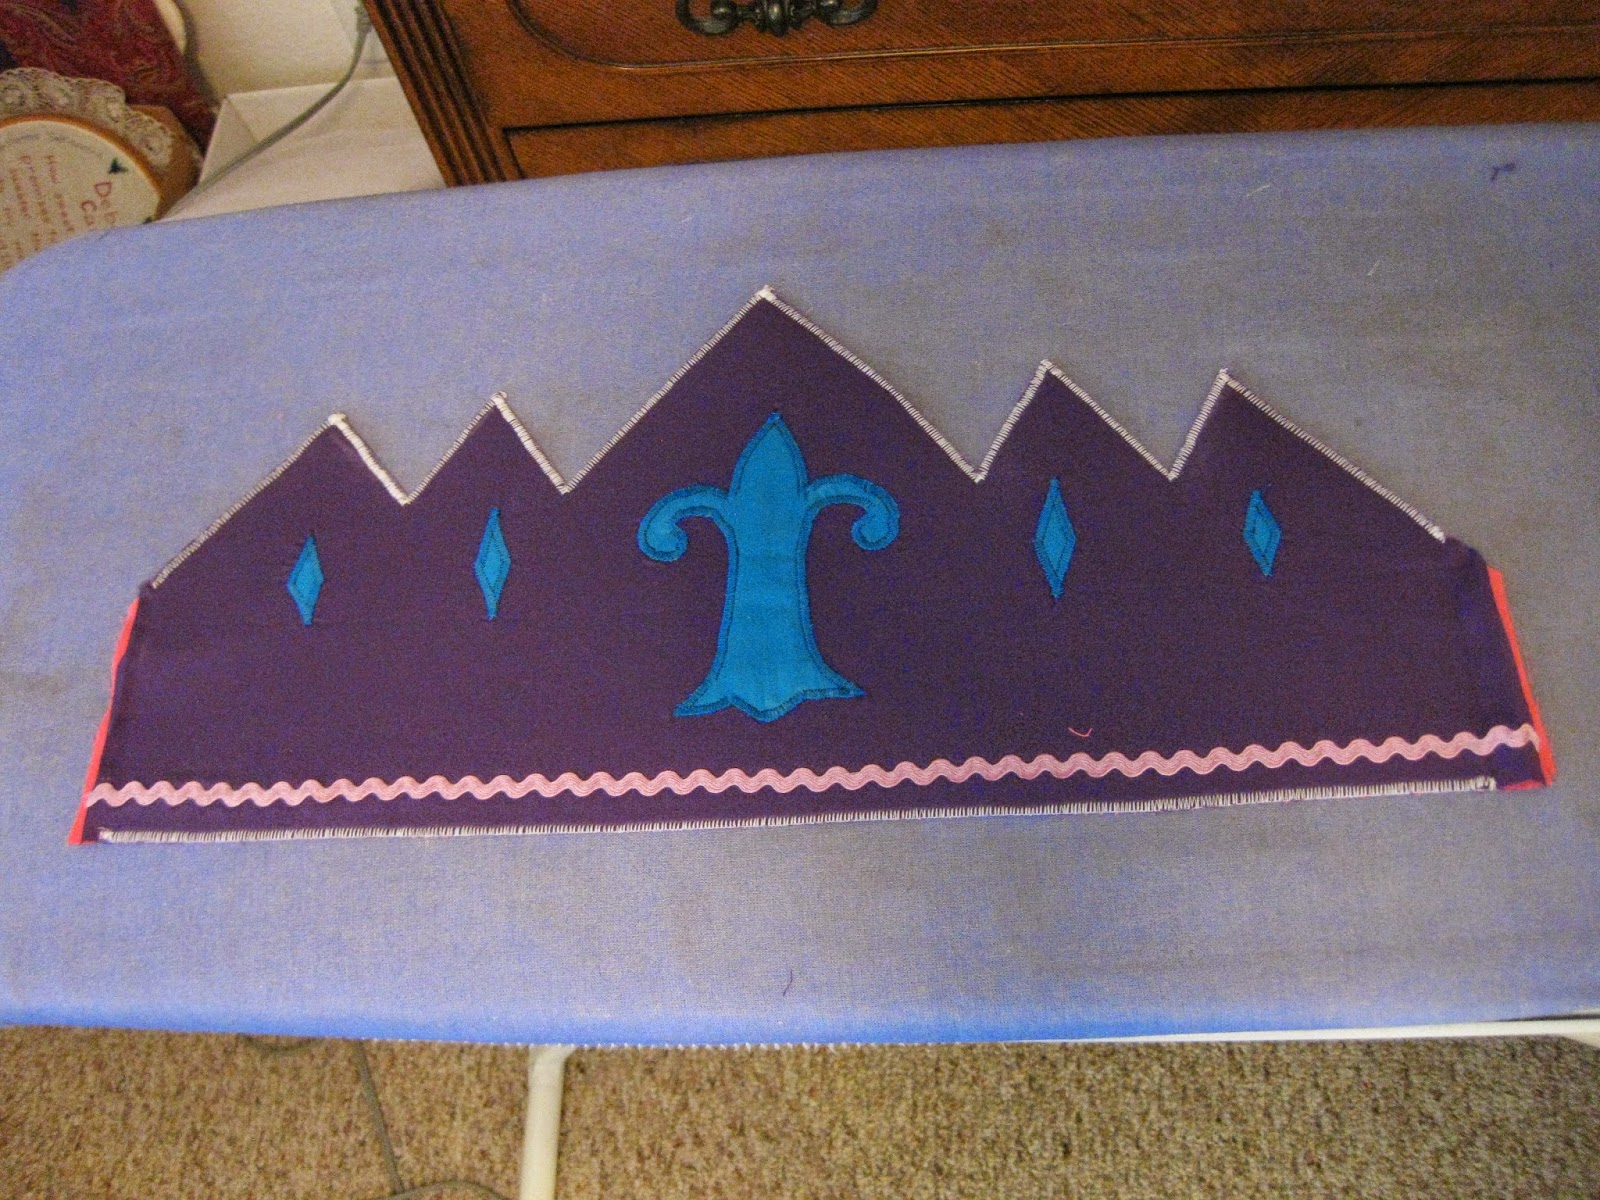
I carefully pinned each piece to the purple fabric and stitched around the edges with a close, wide, zig zag stitch. Then I added a rick rack border to the bottom, so that I could hand sew on the on the pink fabric side and hide my stitches in the rick rack. Plus, it's a cute addition to the purple side.
Next, I sandwiched the interfuse between the two rectangular panels and ironed it down.
The next part was re-drawing my crown points and cutting off the top.
I finished the edges with a wide, close, zig-zag stitch like I use to sew down my appliques.
Pink side is still blank.
I used an entire spool of purple ribbon, cutting it into four equal parts. I sewed them into the two remaining sides like pictured below, so the crown can adjust with age and head size. This also allows it to be worn as either purple or pink.
The last step was hot-gluing heart-shaped gems (or buttons) to the pink side. I also added a little organza to the bottom edge and hand-sewed it in puffs at each of the crown points.
I actually tried it on Daisy throughout the process to make sure it would fit her, so it wasn't a surprise per se (but toddlers sometimes forget these things when not in sight). She wanted to play with it, but I said, "I'm going to give it to you later." On her birthday, I gave it to her, and she loved it. She wore the pink side the morning and the purple side in the afternoon.

She's playing with my other gift to her: a fisher price castle ($10 craigslist score).

She tends to prefer the pink side, probably due to the gemstones. She also only likes to wear it for about 10 minutes at a time. Then she puts it away. I think she'll like it better when her head gets a little bigger, and it fits more snugly.

Overall, the crown was a success! If you're interested in making one and have questions, please ask away! I'm not an expert at sewing, but I can try to help you find the answer!


Comments